Chocolate • Currently Craving • Seasonal
Chocolate Cream Pie Bars
November 13, 2023
These chocolate cream pie bars are a fresh take on the always classic, always nostalgic chocolate cream pie. My version […]

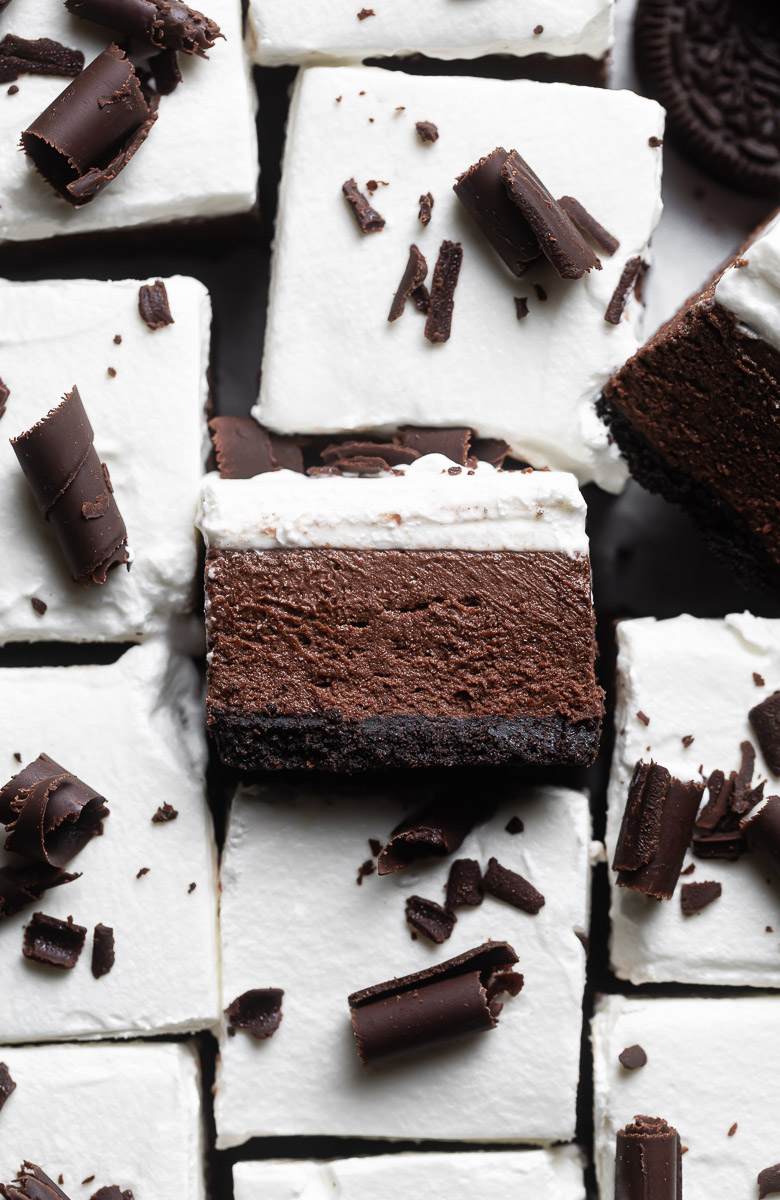
These chocolate cream pie bars are a fresh take on the always classic, always nostalgic chocolate cream pie. My version is made without a pie dish which makes these bars ultra shareable and perfectly snack-able. Made with a crispy chocolate cookie crust, the bars are piled high with a deeply chocolatey, made-from-scratch cream filling and topped with a fluffy layer of freshly whipped cream and chocolate curls. Need I say more?
What makes these bars so good?
These chocolate cream pie bars check ALL the boxes! If you’re looking for a delicious (almost) no-bake dessert that is perfect any time of year, look no further. Here’s a few reasons why I love these triple layer bars:
Rich chocolate flavor. These bars are decadent with a capital D. Made with two kinds of chocolate and a crispy Oreo cookie crust, these bars are for serious chocolate lovers only!
Thick and creamy. These bars are super thick and deliciously creamy. And the ratio of filling to crust is perfection if I do say so myself. Good luck having just one!
Easy to make. These one pan bars are so much easier to make than a whole pie and they’re easy to slice and serve individual in portions. Forks optional! I’m doling out extra bonus points because they come together quickly and only the crust needs to be baked. Once the filling is whipped together, the bars go straight to the fridge to chill. Easy peasy!
The perfect make ahead dessert! I love an easy make ahead dessert that feeds a crowd. Assemble the bars the day before serving and chill in the fridge overnight. Tah-dah, dessert is served!

Ingredients
Whip up these easy chocolate cream pie bars in minutes with just a handful of simple ingredients. Here’s what you’ll need:
- Butter – we’re melting the butter so you can use it straight from the fridge.
- Chocolate – for the best flavor, chop up a high quality chocolate bar or use premium chocolate chips like Guittard or Ghirardelli.
- Heavy whipping cream – make sure it’s chilled for best results.
- Powdered sugar – always sift the powdered sugar for the smoothest texture.
- Cream cheese – opt for full fat cream cheese in this recipe and be sure to soften it to room temperature.
- Cocoa powder – a darker, rich Dutch-process cocoa powder is my first choice, but you can use regular unsweeetened cocoa powder in a pinch.
- Vanilla – just a splash adds an added depth of flavor.
- Salt – a sprinkle of salt helps balance the sweetness.
How to make chocolate cream pie bars
These bars come together as easy as 1-2-3. I like to make the cookie crust from scratch but you can opt for store-bought crust to save on time. Follow this step-by-step guide and check the recipe card below for ingredients and detailed instructions.
Step 1: Preheat the oven to 350°F. Line an 8 x 8 baking pan with parchment paper, allowing the paper to hang over the sides of the pan by 2 inches for easy removal of the bars once baked.
Step 2: Pulse the Oreo cookies in a food processor until finely ground. Add melted butter and stir with a fork to combine well. Transfer the crumbs to the prepared pan and use the bottom of a measuring cup to press them evenly into the pan.
Step 3: Bake for 10 minutes. Remove from the oven and set aside to cool slightly.

Step 4: In the bowl of a stand mixer fitted with the whisk attachment, beat together 1 cup of heavy whipping cream and two tablespoons of powdered sugar until firm peaks form. Place the mixing bowl in the refrigerator until ready to use.
Step 5: Using a double boiler, melt together the butter and chocolate until melted and smooth. To make a double boiler, place a heat safe bowl over a pot filled with 2 inches of water. Place the butter and chocolate in the bowl and bring the water to a simmer. Stir often to be sure the chocolate doesn’t overcook. Once melted, carefully remove the bowl from the pot, making sure any condensation does not drip into the chocolate mixture. Set aside to cool for 10 minutes.
Step 6: Once the chocolate is cool, use a hand mixer to combine the softened cream cheese, powdered sugar, cocoa powder, vanilla and salt. Mix until smooth and fluffy.
Step 7: Pour the melted chocolate into the bowl and mix with the hand mixer for about 20 seconds. Do not over mix.
Step 8: Remove the whipped cream from the refrigerator and gently fold half of it into the chocolate and cream cheese mixture. Once about halfway combined, add the remaining whipped cream and continue gently folding until all of the whipped cream is incorporated.
Step 9: Transfer the mixture to the prepared crust and use an offset spatula to spread it into the corners and level the top.

Step 10: Chill for 3 hours or overnight.
Step 11: Before serving, whip 1 cup of heavy whipping cream together with 2 tablespoons powdered sugar in the bowl of a stand mixer fitted with the whisk attachment. Alternatively, you can use a hand mixer. Spread the whipped cream evenly over the top of the chocolate layer. Add chocolate shavings or curls if desired. Slice and serve cold.

Tips for the best bars
For the prettiest, most delicious chocolate cream pie in bar form, be sure to follow these easy tips and tricks.
Use high quality chocolate. These bars have only a handful of ingredients so be sure to use the highest quality you can find for the best flavor. I like Hershey’s Dark Unsweetened Cocoa or Rodelle Organic Dutch-Process Cocoa Powder. For the chocolate, I recommend a good quality chocolate bar or Ghirardelli semi-sweet chocolate chips.
Keep the filling cold. Work quickly while making the filling and don’t let it sit out at room temperature for too long. It will firm up as it chills so you’ll get nice clean, sharp edges when you slice the bars.
Slice cold straight from the fridge. For picture perfect squares, slice the bars while very cold (chilled overnight is best). Clean the knife with hot water and wipe dry with a dish towel in between slices for best results.

How to store
Store these chocolate cream pie bars in the refrigerator until ready to serve. They freeze quite nicely when stored in an airtight container. For best results, freeze before slicing into squares. Defrost in the refrigerator before serving.

FAQ’s
Absolutely! They’re perfect for making a day before serving and will keep nicely in the refrigerator.
Just substitute gluten free Oreos for the regular version. They’ll be delicious!
Great idea! Add about 2 to 3 teaspoons of espresso powder to the chocolate filling when you add the cocoa powder for a delicious mocha flavor.
For the best flavor and texture, I recommend full fat cream cheese.
Of course. These bars would be delicious with a graham cracker or shortbread crust. Feel free to get creative!
Yes! These bars are super customizable so feel free to substitute the chopped chocolate or chocolate chips with milk, dark or bittersweet chocolate. The choice is yours!
Yes. To make a traditional pie instead of bars, follow the directions but use an 8 or 9 inch deep-dish pie dish.
Happy baking!
Looking for more decadent chocolate desserts? You’ll love these:

Chocolate Cream Pie Bars Recipe
- Prep Time: 20 minutes
- Cook Time: 10 minutes
- Total Time: 30 minutes
- Yield: 16 squares 1x
- Category: Bars & Brownies
- Method: Baking
- Cuisine: American
Description
These decadent three layer chocolate cream pie bars are a fresh take on the classic pie. Made with a crispy cookie crust, a rich, creamy chocolate filling and topped with freshly whipped cream. A chocolate lover’s dream!
Ingredients
For Chocolate Cookie Crust
- 2 cups Oreo cookie crumbs
- 5 tablespoons unsalted butter, melted
For Chocolate Cream Filling
- 1 cup heavy whipping cream, cold
- 2 tablespoons powdered sugar
- 5 ounces semi-sweet chocolate chips (or chopped chocolate bar)
- 4 tablespoons (57 g) unsalted butter
- 6 ounces full fat cream cheese, room temperature
- 1 1/2 cups (180 g) powdered sugar, sifted
- 1/3 cup (35 g) unsweetened cocoa powder, sifted (I like Hershey’s Special Dark)
- 2 teaspoons vanilla
- 1/2 teaspoon salt
For Whipped Cream Topping
- 1 cup heavy whipping cream
- 2 tablespoons powdered sugar
- 1/2 teaspoon vanilla
Shaved chocolate for topping, if desired
Instructions
For Chocolate Cookie Crust
- Preheat the oven to 350°F. Line an 8 x 8 inch baking pan with parchment paper. Allow the paper to hang over the sides of the pan by a couple of inches for easy removal of the bars once baked. Set aside.
- Pulse about 20 Oreo cookies (with the filling removed) in the bowl of a food processor until finely ground. You should have about 2 cups of cookie crumbs.
- Transfer the crumbs to a medium bowl and add the melted butter. Stir with a fork until all of the crumbs are coated in the butter.
- Transfer the cookie crumbs to the prepared pan and use your hands or the bottom of a measuring cup to press the crumbs evenly into the corners of the pan.
- Bake for 10 minutes. Remove from the oven and set aside to cool while you make the filling.
For Chocolate Cream Filling
- Use a double boiler to melt the butter and chocolate over medium-low heat. To create a double boiler, place a heat safe bowl over a medium pot filled with 2 inches of water. Bring the water to a simmer and stir frequently as the chocolate and butter melt. Stir until melted and smooth. Remove the bowl from the pot, being careful not to let any of the condensation from the water drip into the chocolate mixture. Set aside to cool for 10 minutes.
- While the chocolate is cooling, whip together 1 cup of heavy whipping cream with 2 tablespoons of powdered sugar until firm peaks form. Place the bowl in the refrigerator to keep cold.
- In a large bowl, add the softened cream cheese, powdered sugar, cocoa powder, vanilla and salt. Use a hand mixer to mix until smooth, about 1 minute.
- Add the cooled chocolate mixture to the bowl and mix on low speed for about 30 seconds until well combined.
- Remove the whipping cream from the refrigerator and use a large spatula to fold half of the cream into the chocolate mixture. Before it is fully combined, add the remaining whipped cream and gently fold together until no white streaks remain.
- Transfer the filling to the top of the cookie crust and use an offset spatula to press it into the corners of the pan and level the top.
- Chill for 3 hours or overnight.
- Before serving, whip 1 cup of heavy whipping cream together with 2 tablespoons of powdered sugar and vanilla. Whip until smooth and firm.
- Transfer the whipped cream to the top of the filling and use an offset spatula or spoon to spread it evenly across the top. Top with chocolate shavings or curls if desired.
- For best results, chill the bars for 30 minutes before using a sharp knife to cut into squares. Clean the knife between each slice with hot water and wipe with a dry dishtowel.
Notes
Store tightly covered in the refrigerator for up to 4 days.
May be frozen.


Snickerdoodle Bars


9 Comments
Caitlin
March 13, 2024 at 4:12 pmI am intrigued by the option of freezing these bars, but I don’t know that I have the right kind of storage container. What about freezing them exposed to the elements initially and then wrapping them in plastic wrap and in a freezer bag for long-term storage?
Kim
January 18, 2024 at 6:55 pmWow! I made these last weekend for book club, and they flew off the plate. They’re very rich, so I cut them quite small. And the whipped cream helps to balance it out. Thanks for sharing!
Natalie K.
January 8, 2024 at 4:21 pmIncredibly rich and delicious!
Alyssa
November 29, 2023 at 3:03 amI now live and travel in an RV so it’s important to find recipes that don’t require a lot of special tools or gadgets as the majority of mine are in storage. I used a rolling pin and zip lock bag to crush the oreos for the bottom, mimicking the consistency shown in the photos. Turned out great! My friends and husband loved them! So easy 10/10
Jen Burke
November 25, 2023 at 7:46 pmI made these for Thanksgiving and they were the favorite dessert. Absolutely delicious!
Kiki
November 18, 2023 at 2:16 amChocolicious! Such a delightful recipe. Thank you, Heather.
Amanda
November 16, 2023 at 2:47 pmI’d love to make this in a 13×9 to feed a crowd; would it be a straight double conversion? Thank you!
Heather Mubarak
November 16, 2023 at 3:01 pmYes, double the recipe for a 13 x 9 pan. Enjoy!!
Suzie Nava
November 14, 2023 at 7:56 pmI love how easy this recipe is and that it can serve many! This will be the perfect party recipe for all my chocolate loving friends and family!!