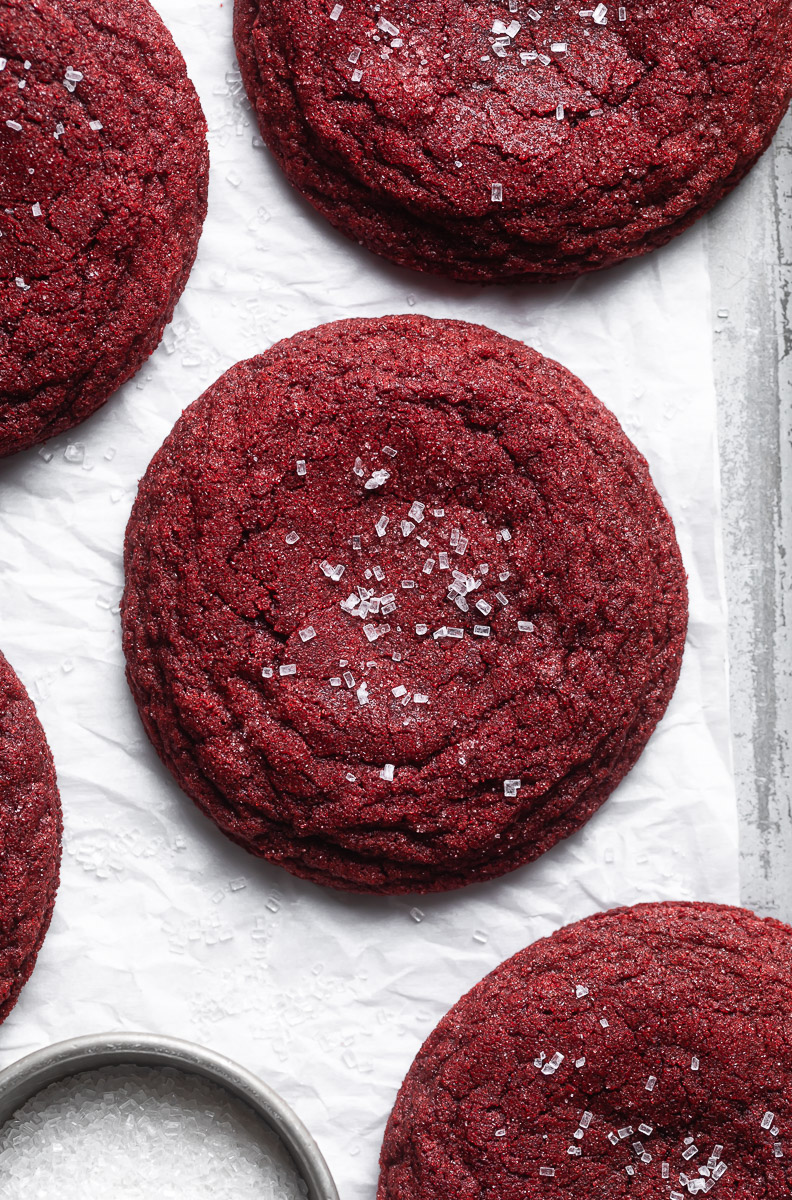
Introducing my newest cookie crush. Talk about love at first bite! These red velvet cookies are soft and chewy on the inside with a rich, fudgy texture that makes them positively irresistible. You’ll want to make them over and over again!

Why I love these cookies
Ever since I made this Red Velvet Bundt Cake last year, I’ve been obsessed with all things red velvet. And while I do love a nice slice of cake as much as the next girl, these cookies are so much easier to make. Here’s a few reasons why I love these cookies:
A delicious twist on the classic red velvet cake. All the classic flavor of red velvet cake in cookie form. The mild chocolate flavor with hints of vanilla simply melts in your mouth. Add a swirl of your favorite cream cheese frosting for an extra decadent dessert.
Easy to make. Whip up a batch of these easy red velvet cookies in minutes with just a bowl and a whisk. No mixer required.
No chill cookie recipe. Perfect for when you want a cookie and you want it now!
Stay fresh for days. These cookies bake up soft and chewy and stay moist for days – if they last that long.
The perfect holiday treat! A sweet treat that everyone will love for Valentine’s Day and Christmas too!

Ingredients
You’ll need just a handful of pantry staples to make these easy red velvet cookies. Here’s your shopping list:
- Flour – all-purpose flour gives the cookies structure and chew. For best results, always measure your flour with a digital kitchen scale.
- Sugar – we’re using both brown sugar and granulated sugar for sweetness and texture.
- Butter – melting the butter first and then chilling it quickly gives us a perfectly chewy cookie that doesn’t spread too much in the oven.
- Cocoa powder – I like to use Dutch-process from Rodelle or Hershey’s Special Dark for a rich, chocolatey flavor.
- Egg – make sure it’s at room temperature!
- Red gel food coloring – for that classic red velvet cake hue! You decide how red you want your cookies to be. I use 1 1/2 teaspoons in the recipe but you can use more or less to suit your taste. Do not substitute with liquid food coloring.
- Vanilla – use a high quality vanilla for the best flavor.

How to make red velvet cookies
These deliciously decadent red velvet cookies come together quickly with just a bowl and a whisk. And the best part is you don’t even need to chill the dough! Follow this simple step-by-step guide and check the recipe card below for ingredients and detailed instructions.
Note: Make the red sanding sugar first so it’s ready to use once the cookie dough is made.
Step 1: In a small saucepan, melt the butter over medium-low heat. Pour the butter into a shallow dish or plate and freeze for 5 to 8 minutes until cold. Do not let it solidify.
Step 2: Transfer the butter to a medium bowl. Add the sugars, egg and vanilla. Whisk to combine.
Step 3: Add the red food coloring. Stir until fully incorporated.
Step 4: In a separate bowl, whisk together the flour, cocoa powder, baking powder, baking soda and salt. Add the dry ingredients to the butter and egg mixture. Use a large spatula to fold the ingredients together. Do not over mix.
Step 5: Let the dough rest at room temperature while you preheat the oven to 350°F. Line two large baking sheets with parchment paper.

Step 6: Once the oven is preheated, use a large cookie scoop to portion out the dough. Roll the dough between the palms of your hands into a smooth ball. Place the dough into a shallow bowl filled with the colored sugar (or use regular granulated sugar), turning until it is coated on all sides. Bake 6 cookies per sheet, leaving 2 to 3 inches between the cookies as they will spread in the oven. Bake one sheet at a time in the center of the oven for 9 to 10 minutes or until the edges are set and the centers of the cookies are slightly puffy. Do not over bake or the cookies will be dry instead of soft and fudgy.
Step 7: Remove the cookies from the oven and cool on the cookie sheet for 5 to 10 minutes. The cookies will deflate as they cool. Sprinkle with more colored sugar if desired.

How to make colored sanding sugar from scratch
You can use store-bought sanding sugar but making it from scratch is easier than you might think. Just add granulated (or course) sugar to a large plastic bag along with a dollop of gel food coloring. Shake it until all of the sugar is coated and then strain and spread the sugar onto a large baking sheet. Bake in 250°F oven for 10 minutes. And there you have it…homemade sanding sugar to make your sweets extra festive. Have fun experimenting with different colors and use it top your cookies, cakes, cupcakes and more!

How to store
This recipe makes 10 to 12 large cookies. They won’t last long but if you do have a few cookies left over, store them tightly covered at room temperature for up to 4 days. The cookies freeze beautifully for up to 3 months. Be sure to cool them completely before freezing and for best results, wrap in two layers of plastic wrap and place in a large plastic freezer bag or container. Defrost at room temperature before serving. Or better yet, warm them slightly in a 300°F oven for 5 to 8 minutes and serve with a tall glass of cold milk!

FAQ’s
Yes! Simply substitute an equal amount of the all-purpose flour with your favorite gluten free flour blend. For best results, be sure that the flour contains xanthan gum.
Absolutely! The red gel food coloring combined with the cocoa powder gives these cookies that signature red velvet color and flavor. But you can omit the food coloring and still enjoy a delicious chocolate cookie.
Great idea! To get the full red velvet cake experience, feel free to top the cookies with a dollop of cream cheese frosting. Or better yet, turn it into a cookie sandwich by swirling the frosting between two cookies. SO GOOD!
Of course. The red sanding sugar makes for an especially pretty cookie but feel free to use regular granulated sugar instead.
Please do! Chocolate chips would be a great addition to these cookies. Stir in up to 3/4 cup after adding the dry ingredients. White chocolate chips would be a delicious variation too!
I don’t recommend it. Gel food coloring is much more concentrated and it won’t water down the dough like liquid food coloring will. You can also try beet powder or a natural gel color but note that the hue won’t be as vibrant.

Happy baking!
Looking for more delicious Valentine’s Day recipes?

Red Velvet Cookies Recipe
- Prep Time: 15 minutes
- Cook Time: 10 minutes
- Total Time: 25 minutes
- Yield: 12 cookies 1x
- Category: Cookies
- Method: Baking
- Cuisine: American
Description
These red velvet cookies have all the delicious flavor of your favorite red velvet cake but are much faster to make. With their soft and chewy texture and rich, fudgy flavor, it’s love at first bite!
Ingredients
For Cookies
- 1/2 cup (113 g) unsalted butter
- 1/2 cup plus 1 tablespoon (110 g) light brown sugar
- 1/4 cup (50 g) granulated sugar
- 1 large egg, room temperature
- 1 1/2 teaspoons vanilla
- 1 1/2 teaspoons red gel food coloring
- 1 1/4 cups (160 g) all-purpose flour
- 2 tablespoons cocoa powder, sifted (I use Dutch-process or Hershey’s Special Dark)
- 1/2 teaspoon baking soda
- 1/2 teaspoon baking powder
- 1/2 teaspoon salt
- 1/2 cup red sanding sugar for rolling
For Red Sanding Sugar
- 1/4 cup (50 g) granulated or course sugar
- dollop of red gel food coloring (do not use liquid food coloring)
Instructions
For Cookies
- In a small saucepan, melt the butter over medium-low heat. Alternatively, you can melt the butter in a microwave. Pour the butter onto a shallow bowl or plate and freeze for 5 to 8 minutes. Do not let it solidify.
- Add the butter to a medium mixing bowl. Add the brown sugar, granulated sugar, egg, vanilla and red gel food coloring. Whisk to combine well.
- In a separate bowl, whisk together the flour, cocoa powder, baking soda, baking powder and salt. Add the dry ingredients to the butter and egg mixture and use a large spatula to fold the ingredients together. Do not over mix.
- Let the dough rest while you preheat the oven to 350°F. Line two baking sheets with parchment paper.
- Using a medium cookie scoop, divide the cookies the cookies into approximately 2-ounce portions. Roll the balls in sugar and place on parchment lined baking sheet, leaving 2 to 3 inches between cookies.
- Bake 9 to 10 minutes or until edges are set and centers are still slightly puffed up and under baked. Do not over bake. Remove from the oven and sprinkle with more sugar if desired. Cookies will deflate as they cool.
For Red Sanding Sugar
- Preheat the oven to 250°F. Line a large baking sheet with parchment paper.
- In a large plastic bag, combine 1/4 cup granulated sugar and a dollop of red gel food coloring. Shake the bag and use your hands to massage the food coloring into the sugar. Continue until all of the sugar is covered.
- Sift the colored sugar through a fine mesh strainer into a medium bowl. Discard any large bits of sugar. Repeat several times until the sugar looks uniform.
- Spread the sugar onto the prepared pan, using your hands to spread it evenly. Bake for 10 minutes.
- Remove the sugar from the oven and cool for at least 15 minutes before using.
Notes
Store cookies tightly covered at room temperature for up to 5 days.
May be frozen for up to 3 months. Wrap tightly in two layers of plastic wrap and then place in a large plastic freezer bag. Defrost at room temperature before serving or warm in a 300°F oven for 5 to 8 minutes.


Lemon Brownies


3 Comments
Hannah
May 31, 2024 at 2:24 amI was a little apprehensive about trying this recipe because I didn’t see any reviews. But after trying this, I’m so glad I did! I used the Rodelle dutch processed cocoa, added chocolate chips, and it is perfect. They look beautiful as well. 🙂
Dawn
February 8, 2024 at 8:02 pmI noticed the metric for measuring doesn’t change when you change the metrics
maura
February 7, 2024 at 11:24 amI’m dying to try these BUT I’m in Italy and gel food coloring is impossible to find:-( I’ve found a vegetable-based powder or liquid. Can I try substituting with the powdered food color?